#
Installing the plugin
Video walkthrough of the first steps: https://www.youtube.com/watch?v=78vurTeroX4
Because of how integral an inventory system is to a game, I highly recommend you DO NOT install the plugin to the engine and then use it that way, but instead install the plugin locally to your project. That way you can use the plugin in multiple projects without having a change that works in one project mess up the other project.
This means you can also have much better control how the parents behave and work and not have to worry about changes made for another project. But it does mean updating the system is a bit more work, but it is very straight forward if you have source-control set up, as it'll tell you all the changes and you can reimplement any custom changes you made to suit your project.
This is not mandatory, but can greatly help in the future when you want to update safely.
Once you are done installing the plugin (either locally or through the engine), I HIGHLY advise you make children of any class in this system once you want to modify the class. This should make updating in the future a lot easier and gives you a lot more customizability.
This does NOT cover how to install an IDE such as Rider or Visual Studio. You should already have an IDE installed.
Unreal's docs for setting up Visual Studio
There are also a few demo files that you’ll want to replace and enum entries you need to rename to fit your project.
- Download the plugin through the Epic games client just like how you would download any other plugin.
- If your project doesn’t have any C++ code, you will want to go into the engine and at the top go to Tools -> New C++ Class. It doesn’t matter what you create here or where you save it. This is just to get the engine to generate all the files you need to compile the plugin.
- Go to your Unreal Engine installation -> Engine -> Plugins -> Marketplace and copy the InventoryFrameworkPlugin folder.
- Go into your project's root folder (Where your .uproject is), create a folder called “Plugins” if you don’t have one.
- Paste the InventoryFrameworkPlugin folder into the plugin folder.
- Go back to your .uproject, right click and press "Generate Visual Studio Project Files”.
- Open the solution file with whatever IDE you use (For example Visual Studio or Rider) and build the project.
- (Optional) You can now uninstall the plugin from the engine through the Epic Games Launcher, though you won't get notifications from the Epic Games client whenever an update is available (The discord announces every update as well).
- The engine automatically enables the plugin the majority of the time. In rare cases, it might not enable it. If it didn't, open your project, go to Edit -> Plugins and search for "Inventory Framework Plugin" and make sure it's enabled.
Everything in the demo folder is designed to be replaced by your assets/Blueprints. It is only there so you don’t get any errors on startup.
Important
It is highly recommended to start making children of any classes you plan on using or modifying -like the inventory component - immediately. Blueprints especially, since revision control is very difficult to handle with Blueprints. Doing this early will save you a lot of headaches.
#
Finding the plugin content in your content browser
To find the blueprints, you will want to start the engine, go into your content browser and make sure that in your settings (1) and make sure "Show Plugin Content" (2) is checked. Once that is checked, you will find a "Plugins" folder and in there you will find "InventoryFrameworkPlugin content" (3)
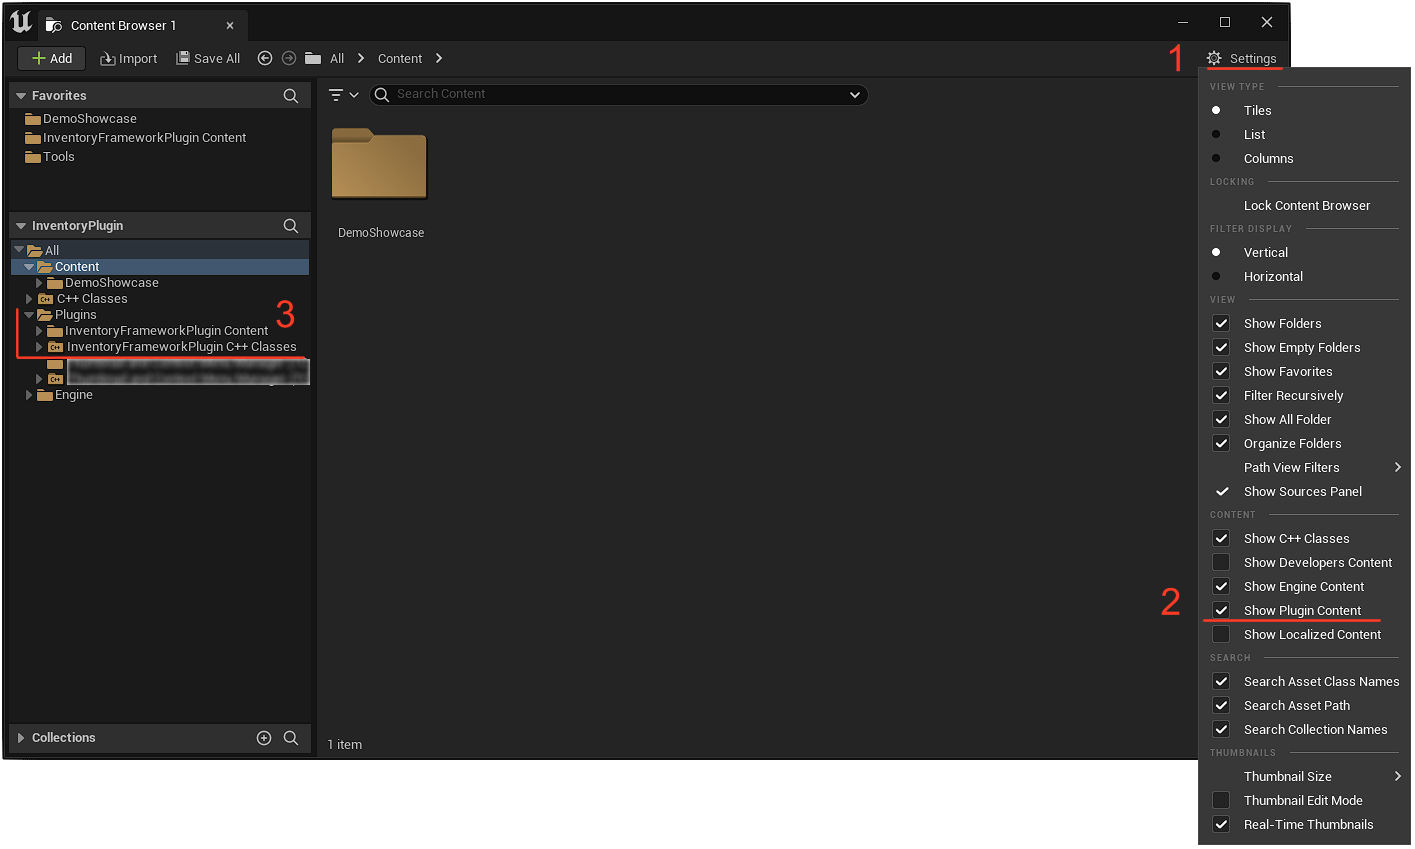
If you decide to NOT install the plugin locally, you will also have to check "Show Engine Content" and then go into Engine -> Plugins -> InventoryFrameworkPlugin Content
It is highly recommended to head over to the How does the system work? page and giving a read before proceeding.
#
Github repository access
To access the example projects repository and the associated example plugins plugins, you will need to verify your purchase by forwarding your Epic Games receipt to my email (Varianprofessional@gmail.com) with your Github username